


In this article
- First: Is it safe to change an electric toothbrush battery?
- The correct steps to replace an Oral-b toothbrush battery
- What to pay attention to when changing toothbrush batteries?
- What type of battery is in an Oral-B toothbrush?
- How many years does an Oral-B battery last?
- What do you do if your Oral-B toothbrush won't charge?
Thinking about swapping the battery in your Oral-B toothbrush? Many people want to revive their trusty cleaning companion but aren’t sure how to navigate the process. Unlike devices that take standard AA batteries, most Oral-B brushes house a built-in rechargeable battery so that the replacement process is a bit more intricate. For detailed instructions and tips to bring your toothbrush back to life, read our comprehensive guide and brush on with confidence!
[Related topics: How to store toothbrush?]
[Realted topics: How to fix my electric toothbrush not charging?]
First: Is it safe to change an electric toothbrush battery?

Yes, but it’s not a task to take lightly. Most electric toothbrushes, especially those from Oral-B, come equipped with sealed rechargeable batteries that manufacturers don’t exactly want you to mess with. However, if you’re up for the challenge, you can carefully swap out the battery.
But these batteries are often soldered into place, which needs tools like a soldering iron, steady hands, and a dash of patience. Mishandling the process could damage the internal components or even render your toothbrush useless.
And let’s not forget, cracking open that case usually voids your warranty. If you’re confident in your tinkering abilities, proceed with caution and follow a reliable guide. Otherwise, it might be safer to replace the entire toothbrush or consult a pro.
The correct steps to replace an Oral-b toothbrush battery

Follow these four steps to revive your toothbrush and keep those bristles buzzing:
1. Arm yourself with tools of precision
Gather a screwdriver, soldering iron (if necessary), and a compatible replacement battery. You’ll also want a small tray to hold those sneaky screws that love to vanish.
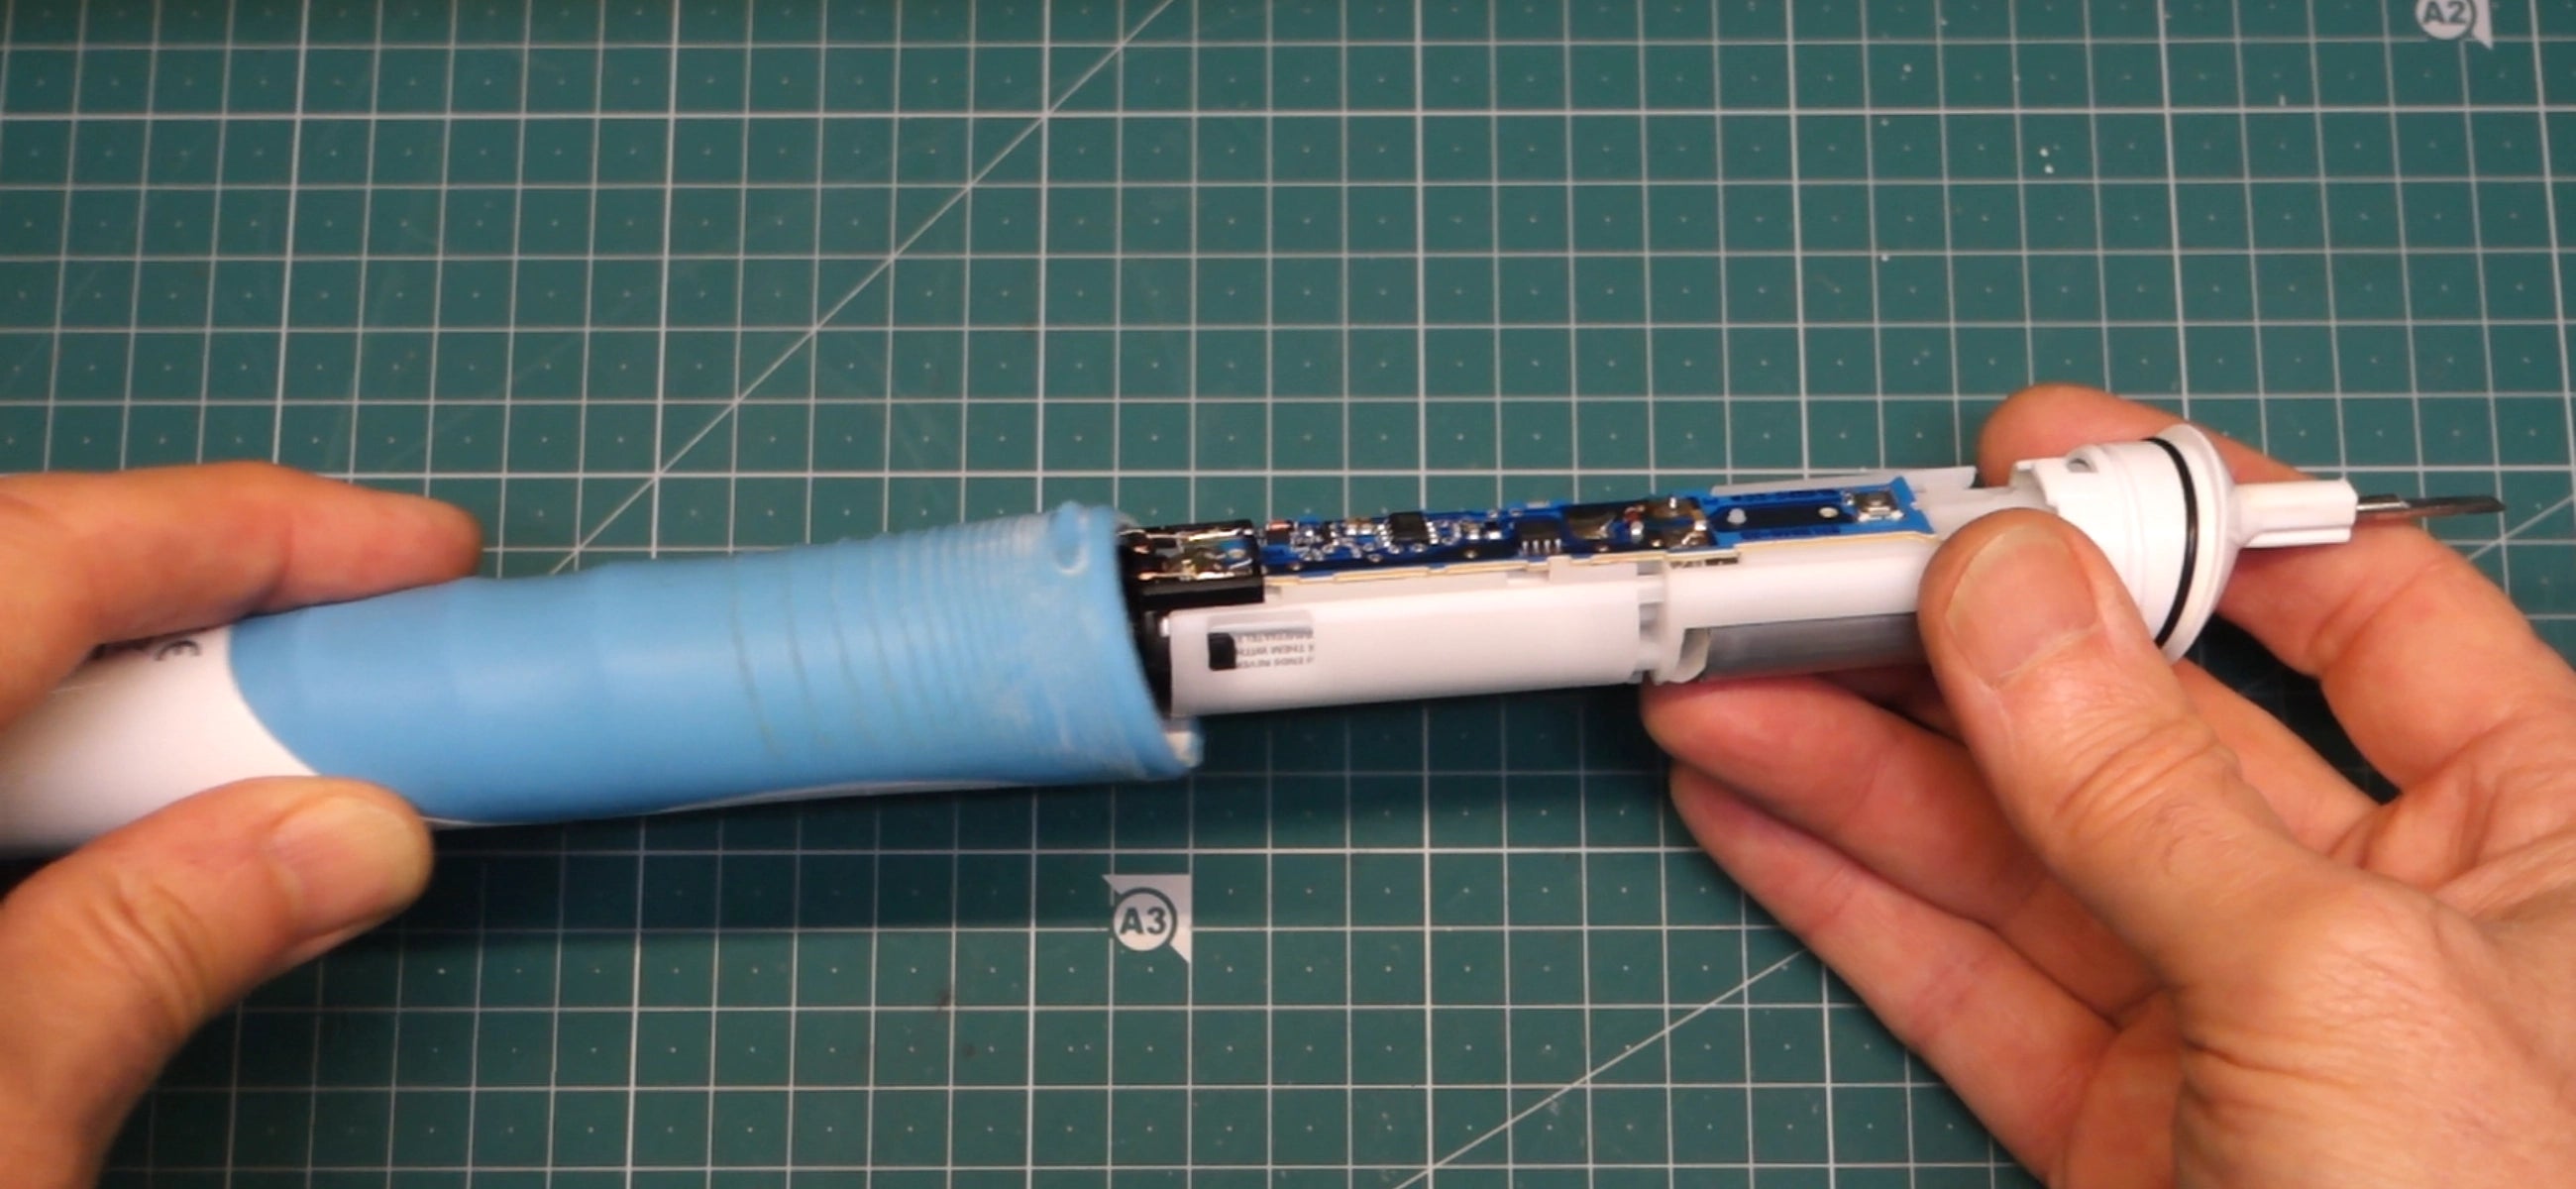
2. Crack open the handle
Locate the seam or twist mechanism at the base of your toothbrush. For models that don’t twist, use a flathead screwdriver to carefully pry the casing apart.
3. Evict the old battery
Once inside, you’ll spot the battery nestled in place. For soldered models, heat up your soldering iron and detach the connections with precision. No solder? Just slide the battery out. Memorize its orientation for the new installation.
4. Install the new power core and reassemble
Insert the replacement battery. If soldering, make clean, firm connections. Reassemble the handle by snapping or screwing it back together. Charge it up and test for that satisfying hum of a revived toothbrush.
What to pay attention to when changing toothbrush batteries?
Here’s what you need to keep in mind to reach a smooth transition from old power to new:
1. Warranty woes

Before you crack open your toothbrush, pause and check the warranty status. Tampering with the device might void any manufacturer guarantees, which will leave you on your own if things go sideways. If it’s still covered, you can reach out for professional service first.
2. Gentle handling is key
Inside your toothbrush lies a delicate ecosystem of components. One wrong move, and you could end up damaging essential parts. Use a precision screwdriver and work with a light touch. Treat the internals like the fragile masterpieces they are.
3. Battery matchmaking
Not all batteries are soulmates for your toothbrush. Defining the replacement battery matches your device’s specifications exactly as wrong voltage or size could spell disaster. Double-check compatibility to avoid turning your brush into a glorified paperweight.
4. Soldering savvy
If the battery is soldered in, prepare for some fine-tuned handiwork. A steady hand with a soldering iron is crucial. Apply just enough solder for a secure connection, if too much or too little, and you’ll risk a faulty circuit or short lifespan.
5. Seal the deal
Once your shiny new battery is in place, reassemble with care. Define everything snapped or screwed tightly to maintain the toothbrush’s waterproof integrity. Keep moisture and mishaps at bay.
What type of battery is in an Oral-B toothbrush?
Let's spark curiosity and add an extra gleam to your Oral-B brushing wisdom.
|
Battery type |
Typical Oral-B models |
Noteworthy features |
Unique tidbits |
|
Nickel-metal hydride |
Pro 1000, vitality series |
Robust, durable, and eco-friendly. A workhorse that’s stood the test of time. |
Budget-conscious enthusiasts. Its energy retention may fade with age, much like vintage wine that’s lost its prime. |
|
Lithium-ion |
Genius, iO series |
Lightweight, ultra-efficient, fast-charging. An innovator’s dream in the oral care realm. |
It’s like having a Ferrari engine in your toothbrush. High-octane, smooth, and ready to perform at the top tier of dental gadgetry. |
|
Alkaline (Disposable) |
Pro health, battery-powered basic models |
Simple, replaceable, and great for travelers who avoid cords and charging docks. |
A no-strings-attached choice. Swap in fresh cells as needed, much like changing the batteries in your childhood Game Boy. |
|
Sealed Internal cell |
Older rechargeable models |
Hardwired into the brush; replacement may require professional assistance or a daring DIY attempt. |
These batteries whisper tales of a bygone era when toothbrushes were built to endure, though modern hands may find their servicing a bit of a treasure hunt. |
How many years does an Oral-B battery last?
The lifespan of your Oral-B’s battery is a tale of partnership. Nurture it with thoughtful care, and it will reciprocate with years of impeccable performance. Does your trusty brush still purr with energy, or has it started to sing the ballad of its swan song?
|
Battery type |
Lifespan |
Factors influencing longevity |
Enchanting insights |
|
Nickel-metal hydride |
3–5 revolutions around the sun |
Overzealous charging, daily grind, and plain old entropy gradually nibble at its stamina. |
Think of it as the dependable steed of your oral care journey. It's reliable, sturdy, but needing care as it gallops through years of loyal service. |
|
Lithium-ion |
5–7 luminous years (sometimes even beyond!) |
Charging etiquette, ambient conditions, and how frequently you summon its power for those dazzling strokes. |
Light, nimble, and ready to outlast even your longest dental odysseys. |
|
Alkaline (Disposable) |
2–3 fleeting months (then time to replace) |
Brush intensity, quality of batteries, and how much you travel with your trusty companion. |
A short, intense burst of brilliance before gracefully bowing out to make way for the next. |
|
Sealed internal cell |
3–5 years in a symbiotic relationship |
Similar to NiMH batteries; lack of replaceability can mark its demise sooner. |
The unsung hero, quietly powering your routine until the day it whispers its farewell, leaving you contemplating an upgrade or a bold DIY mission. |
What do you do if your Oral-B toothbrush won't charge?
If your Oral-B toothbrush has decided to go on an unscheduled power strike, fret not. Want to know how to rekindle its spark and bring it back to life? Follow those guides.
1. Purge the charging nexus of debris
The connection between your toothbrush and its charger is a sacred bond, but even the slightest intrusion of dust or dried toothpaste can disrupt this energy exchange.
What to do:
Use a soft, damp cloth to clean the charging base and the toothbrush’s underside. Take note of crevices where grime may linger. Once cleaned, let it dry before trying again.
2. Verify the electrical source
Your outlet may look reliable, but appearances can deceive. A powerless socket is a silent saboteur in your quest for a charged toothbrush.
What to do:
Test the outlet with another device, such as a phone charger or a lamp. If it doesn’t work, reset the breaker or move to another socket.
Why it matters:
A lively outlet is the lifeline for your charger. Without it, even the most advanced toothbrush is rendered lifeless.
3. Resuscitate the battery
Batteries are peculiar creatures. If your toothbrush has been dormant for an extended time, its battery might have slipped into a deep hibernation.
What to do:
Place it on the charger and leave it undisturbed for at least 30 minutes. Even if it shows no immediate sign of revival, patience may awaken its latent energy.
Why it matters:
Batteries often require a nudge to emerge from their slumber, particularly if they’ve been allowed to drain completely.
4. Realign the charging harmony
Charging is a delicate dance between toothbrush and base. Even a slight misstep in this partnership can prevent the flow of power.
What to do:
Double-check that your toothbrush is seated correctly on the charger. For models with indicator lights, look for the reassuring glow. Place the setup on a stable surface to avoid interruptions.
Why it matters:
Every piece must be in tune for the symphony of charging to play uninterrupted.
5. Reset the brush’s inner rhythm
For smart models like the Oral-B Genius or iO series, a simple reset can be the key to reawakening its dormant circuits.
What to do:
Hold the power button for 10–15 seconds to perform a soft reset. Once complete, place it back on the charger.
Why it matters:
Sometimes, a reset clears internal glitches that prevent the toothbrush from charging, much like restarting a computer to clear a frozen screen.